A shower door can be off by a fraction of an inch and still turn into a full installation problem. That is why knowing how to measure shower door opening correctly matters before you order glass, schedule work, or assume a standard size will fit your bathroom.
If the opening is measured wrong, the issues show up fast. The door may rub, leave gaps, miss level walls, or fail to seal water where it should. For homeowners and property managers, that usually means delays, extra cost, and a bathroom that stays out of service longer than planned.
How to Measure Shower Door Opening Before You Order
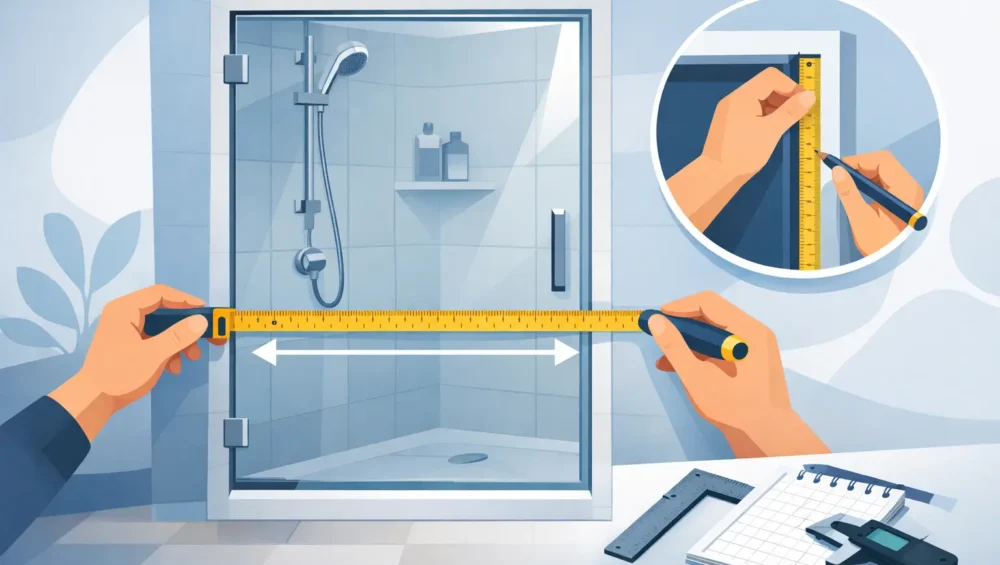
Start with a metal tape measure, a level, a pencil, and a notepad or your phone for photos. A metal tape gives you more reliable readings than a cloth tape, especially when you are measuring across tile, curbs, and wall edges.
Before taking any numbers, make sure the tile work and shower base are finished. You should never measure for the final shower door opening before the walls, curb, and finished surfaces are complete. Even a thin layer of tile or stone changes the opening enough to affect the glass order.
Measure the width in three places – at the bottom, the middle, and the top of the opening. This matters because shower walls are not always perfectly plumb. In many homes, especially older ones, the top width can differ from the bottom. Write down all three numbers exactly as measured.
Next, measure the height on both the left and right sides from the top of the shower curb or base to the height where the glass or door will end. If you are planning a standard swinging shower door, you also need to know whether there is enough vertical clearance for the door and hardware.
Then check the walls with a level. If the wall leans in or out, even slightly, that affects the type of enclosure and hardware that will work best. A framed system can sometimes accommodate more variation than a heavy frameless door, but it depends on the layout.
Photos help here. Take straight-on photos of the opening, side angles of the walls, and close-ups of the curb. If you end up calling a glass contractor for a quote, those pictures make the next step faster and more accurate.
What Measurements Matter Most
When people search how to measure shower door opening, they usually focus only on width. Width is important, but it is not the only number that matters.
The finished width tells you what size door or enclosure may fit. The three-point width measurement tells you whether the opening is consistent or tapered. The height tells you what glass size is realistic and whether your design matches the space.
You also need the curb depth. Measure from the inside edge of the shower curb to the outside edge. This shows whether there is enough flat surface to mount the bottom guide, hinges, or channel, depending on the door style. If the curb is narrow, sloped too aggressively, or uneven, some door options may be ruled out.
Another key detail is the opening direction. Think through whether the door should swing in, out, or if a sliding door makes more sense. In a small bathroom, a swinging door may hit a toilet, vanity, or nearby wall. The opening can measure fine on paper and still be wrong for daily use if clearance is tight.
Finally, note any out-of-square conditions. Measure diagonally from the top left corner to the bottom right, then from the top right to the bottom left if the design allows it. If those numbers differ, the opening is not square. That does not always stop the project, but it affects how custom the glass needs to be.
Common Shower Layouts and How They Change the Measurement
A single straight opening is usually the simplest to measure. You check width in three places, height on both sides, curb depth, and wall plumb. Even then, the smallest width is often the most important because the finished door has to fit the tightest point.
A neo-angle shower is more complex. You are not just measuring one opening. You are dealing with multiple angles, return panels, and exact hinge or door placement. In these cases, a homeowner can gather rough numbers, but final field measurement should usually be left to a professional.
A corner shower with one door panel and one fixed panel also requires more than a simple width check. You need the return panel dimensions, the angle at the corner, and the exact hinge side conditions. If either wall is out of plumb, the glass may need to be fabricated to match that variation.
Sliding shower doors bring another layer. You still measure width and height, but you also need enough wall and curb structure to support tracks or hardware. If the walls are uneven or the curb bows, the sliding system may not operate the way it should.
Mistakes That Cause Expensive Delays
The most common mistake is measuring unfinished surfaces. If tile, wall panels, or a new curb cap are not installed yet, your measurements are temporary at best. Ordering glass from those numbers is risky.
Another mistake is using only one width measurement. Many openings look straight but are slightly tapered. A door sized from the widest point may not fit the narrowest one.
People also forget to account for hardware clearance. Handles, hinges, clips, and sweep seals all need space. A tight bathroom may require a different door style than you first had in mind.
One more issue is assuming every shower opening can take a frameless door. Frameless glass looks clean and modern, but it needs the right structural conditions. Weak walls, uneven curbs, or poor support behind tile can change the recommendation. Sometimes a semi-frameless or framed option is the smarter move for long-term performance.
When a DIY Measurement Is Enough – and When It Is Not
If you are in the early planning stage, a DIY measurement is useful. It helps you understand the likely door size, compare layout options, and get an initial quote. It is also a good first step if you are replacing an older enclosure and want to know whether the same style still makes sense.
But rough measuring and final measuring are not the same thing. Once custom glass is ordered, there is very little room for error. That is why final field verification is worth it, especially for frameless systems, angled openings, or bathrooms with visible wall variation.
For property managers and commercial decision-makers, this matters even more. If a tenant bathroom, hospitality unit, or multi-unit renovation gets delayed because a shower door was ordered from a rough measurement, the lost time can cost more than the measurement service itself.
A professional installer will usually check width, height, wall plumb, level, curb pitch, hardware mounting points, and door swing clearance in one visit. That is the difference between guessing and ordering with confidence.
A Simple Way to Record Your Shower Door Measurements
Keep your notes clear. Write the bottom, middle, and top width separately. Write left and right height separately. Add curb depth and any details about wall lean, nearby obstructions, or whether the curb is level.
Label which side you want the door hinged on and which direction it should open. If there is a toilet, vanity, bench, or towel bar near the opening, note that too. Small details often decide whether the design works in real life.
If you are sending information for an estimate, include photos with your measurements visible or sketched on the image. That saves time and reduces back-and-forth. At Freddy Glass & Doors, clear field information helps move a quote faster and helps avoid surprises when it is time to install.
Getting the opening measured correctly is not about making the process complicated. It is about protecting the result. A shower door should fit cleanly, open smoothly, and look like it belongs there from day one. Taking careful measurements now gives you a much better chance of getting exactly that.